

How to Make Grow Bags at Home: Easy DIY Guide
If you want to grow vegetables, herbs, or flowers in a small space, a grow bag can be a simple alternative to a traditional pot. Making one at home is possible with a durable, clean, water-resistant fabric and a few basic tools. In this guide, we will show you how to make grow bags at home, how to add drainage, how to choose the right size, and how to use your finished bag successfully. We will also explain when a ready-made grow bag from Mashki may be the better choice if you want a stronger, reusable and more consistent option.
Can You Make Grow Bags at Home?
Yes. A homemade grow bag is essentially a flexible container that holds growing media while allowing excess water to drain. The most important qualities are strength, adequate drainage, enough space for the plant’s roots, and a material that will not easily tear or break down when exposed to moisture and sunlight.
For a temporary or small home garden, a DIY bag can be useful. For long-term gardening, however, a purpose-made grow bag can offer more consistent dimensions, stitching, drainage, handles, and UV resistance. If you decide to buy one, you can buy grow bags in different sizes for vegetables, flowers, and larger plants.
Materials You Need to Make a Grow Bag
- Durable woven fabric, geotextile fabric, or another strong water-resistant material suitable for gardening
- Measuring tape and a marker
- Sharp fabric scissors
- Strong polyester or outdoor thread
- A sewing machine or a sturdy hand-sewing needle
- A ruler or straight edge for marking cuts
- Optional: webbing or strong fabric strips for handles
Avoid materials that may release harmful substances into the growing medium, become brittle quickly in sunlight, or cannot support the weight of wet soil. Reusing a clean, suitable fabric is possible, but the material should be free from chemical residues, oil, paint, or other contaminants.
How to Make Grow Bags at Home: Step-by-Step
1. Choose the Right Size
Start by deciding what you want to grow. Small herbs and compact flowers need less root space than tomatoes, chillies, cucumbers, or fruit-bearing plants. A useful approach is to make the bag slightly wider and deeper than the root area you expect the mature plant to need. Remember that a larger bag filled with wet growing media becomes heavy, so plan where it will stay before filling it.
2. Measure and Cut the Fabric
For a simple cylindrical grow bag, cut one rectangular piece for the side wall and one circular or oval piece for the base. Leave extra material along the edges for seams. Measure twice before cutting because accurate dimensions make the final bag stronger and easier to assemble.
3. Sew the Side Seam
Bring the two short edges of the rectangular fabric together and sew a strong vertical seam. Use a durable thread and, if the fabric allows it, make a double seam for additional strength. The seam should hold when the bag is filled with damp growing media, so avoid relying on a single weak line of stitching.
4. Attach the Bottom
Place the base piece against the lower edge of the side wall and sew around the entire circumference. Keep the stitching even and reinforce the seam where the side seam meets the base. This is one of the highest-stress areas because the weight of the growing media pushes downward and outward.
5. Add Drainage Holes
Drainage is essential. Waterlogged roots can suffer from poor oxygen availability and root problems, so the finished bag needs multiple drainage openings near the bottom and, depending on the material and design, some openings around the lower sides. Make the holes large enough to release excess water but not so large that the growing media constantly washes out.
6. Add Handles if Needed
If you expect to move the bag, add two strong handles made from webbing or reinforced fabric. Stitch each handle securely over a wide area rather than attaching it at a single point. Test the empty bag first, then test it with a small amount of growing media before attempting to move a fully watered bag.
7. Check the Finished Bag
- Check every seam for loose stitching.
- Make sure the base is firmly attached.
- Confirm that drainage holes are open.
- Look for sharp edges, exposed wire, or anything that could damage roots.
- Place the bag on a stable surface before filling it.
How to Fill a Homemade Grow Bag
A good grow bag is only part of the setup. Fill it with a well-draining growing medium appropriate for the plant. A common home-gardening approach is to combine quality garden soil or another suitable base with mature compost and an aerating material such as cocopeat, perlite, or coarse organic matter, depending on the crop and local conditions.
Do not pack the mixture down tightly. Roots need air as well as water. Fill the bag gradually and water lightly so the growing medium settles naturally. Leave a little space at the top to make watering easier and reduce the chance of soil spilling over the edge.
Best Plants for Homemade Grow Bags
- Herbs such as mint, coriander, basil, and parsley
- Leafy vegetables such as spinach and lettuce
- Vegetables such as chilli and tomato, when the bag is large enough
- Compact flowering plants
- Some root crops when the bag provides enough depth
Match the bag size to the mature root system rather than choosing a size only because it is convenient. Large or fruit-bearing plants may also need staking or other support, especially when grown on a balcony or terrace.
Common Mistakes to Avoid
- Using thin fabric that tears under the weight of wet growing media
- Making too few drainage holes
- Using contaminated or unknown-material fabric
- Making the bag too small for the plant
- Overwatering because the surface looks dry while the lower layer is still wet
- Moving a heavy, fully watered bag by pulling a weak handle
DIY Grow Bag vs. Ready-Made Grow Bag
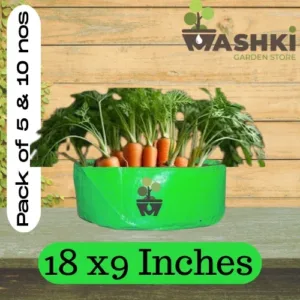
A homemade grow bag can be inexpensive and useful for experimenting with container gardening. Its main advantage is flexibility: you can choose the dimensions and reuse suitable materials. The trade-off is that durability, drainage, stitching quality, and UV resistance depend on the material and construction.
A ready-made grow bag is usually the more convenient choice when you want predictable size, stronger seams, purpose-designed drainage, or a bag intended for repeated outdoor use. Choose according to the crop, available space, expected weight, and how long you want the container to last.
Explore Grow Bags from Mashki
-
Select options This product has multiple variants. The options may be chosen on the product page
Carrot and Radish Grow Bags – Deep Root Fabric Pots for Root Vegetables
Price range: ₹399.00 through ₹5,499.00 -
Select options This product has multiple variants. The options may be chosen on the product page
HDPE Grow Bags – Durable, UV Resistant, Reusable Gardening Bags by Mashki
Price range: ₹199.00 through ₹9,499.00 -
Select options This product has multiple variants. The options may be chosen on the product page
Rectangular Grow Bags – Space-Saving Fabric Planters for Herbs & Succulents
Price range: ₹279.00 through ₹1,599.00 -
Select options This product has multiple variants. The options may be chosen on the product page
Spinach Series Grow Bags – Best Grow Bags for Leafy Vegetables by Mashki
Price range: ₹299.00 through ₹5,999.00
Why Mashki? Our gardening products are made to make home container gardening simpler and more practical. If you are starting with a DIY grow bag, comparing it with a purpose-made Mashki grow bag can also help you understand the difference in sizing, construction and everyday convenience.
Tips for Using Grow Bags Successfully
- Place the bag where the plant will receive the light it needs.
- Keep drainage paths clear and avoid standing the bag in a tray full of water.
- Water according to the plant, weather, and growing medium rather than following a fixed schedule.
- Check the moisture deeper in the bag before watering again during hot weather.
- Support tall plants before they become top-heavy.
- Inspect homemade bags regularly for tearing, seam failure, or deterioration.
Frequently Asked Questions
What is the best material for a homemade grow bag?
A strong woven or geotextile-style fabric designed for outdoor use is generally a better choice than thin household fabric. The material should be durable, breathable or appropriately porous for the design, resistant to moisture, and free from contaminants.
How many drainage holes should a grow bag have?
There is no single number that works for every material and bag size. The goal is reliable drainage without allowing the growing medium to wash out. Start with several openings around the base and lower sides, then check how quickly excess water leaves after the first watering.
Can I use a homemade grow bag for tomatoes?
Yes, provided the bag is large and strong enough for the tomato variety and has good drainage. Tomatoes can become heavy, so the container should be placed in its final location before it is filled and watered. Taller varieties may also need a stake or trellis.
Are grow bags better than pots?
Neither is automatically better for every gardener. Grow bags are lightweight, flexible, and convenient for many crops, while rigid pots can be easier to move when empty and may provide a more permanent structure. The best choice depends on the plant, space, climate, budget, and how often you want to move the container.
Final Takeaway
Learning how to make grow bags at home is a practical way to start container gardening with materials you already have or can source locally. Focus on four essentials: a suitable and clean material, strong seams, adequate drainage, and enough root space for the plant. If you want a ready-made alternative, Mashki grow bags provide purpose-designed options for vegetables, herbs, root crops and other home-garden plants.
Pingback: What Are Grow Bags? Benefits, Uses & How To Grow In Grow Bags